Step By Step Nail Art Instructions With Pictures
Step By Step Nail Art Instructions With Pictures. Apply two coats of white nail polish for the base. Paint within the outline using a slightly thicker brush.

Place another strip vertically at the center and apply orange nail polish on one side.
DIY String Art Tutorial: I've been seeing tons of string art popping up all over the web and decided to try my hand at a piece of my own.
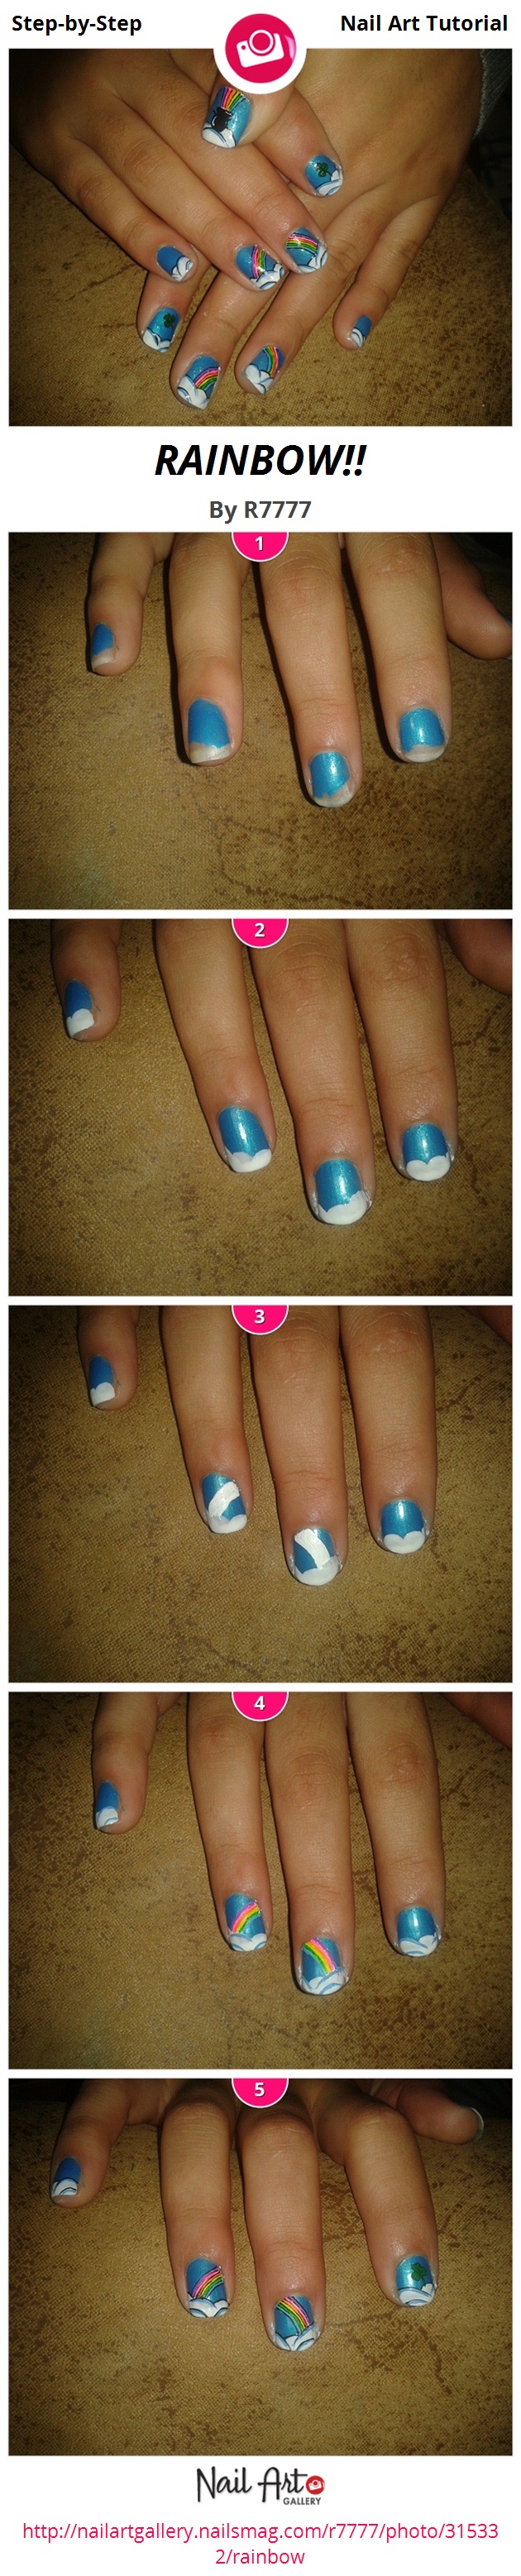
RAINBOW!! - Nail Art Gallery Step-by-Step Tutorial Photos

Simple Nail Art Tutorial Step By Step - Style Arena
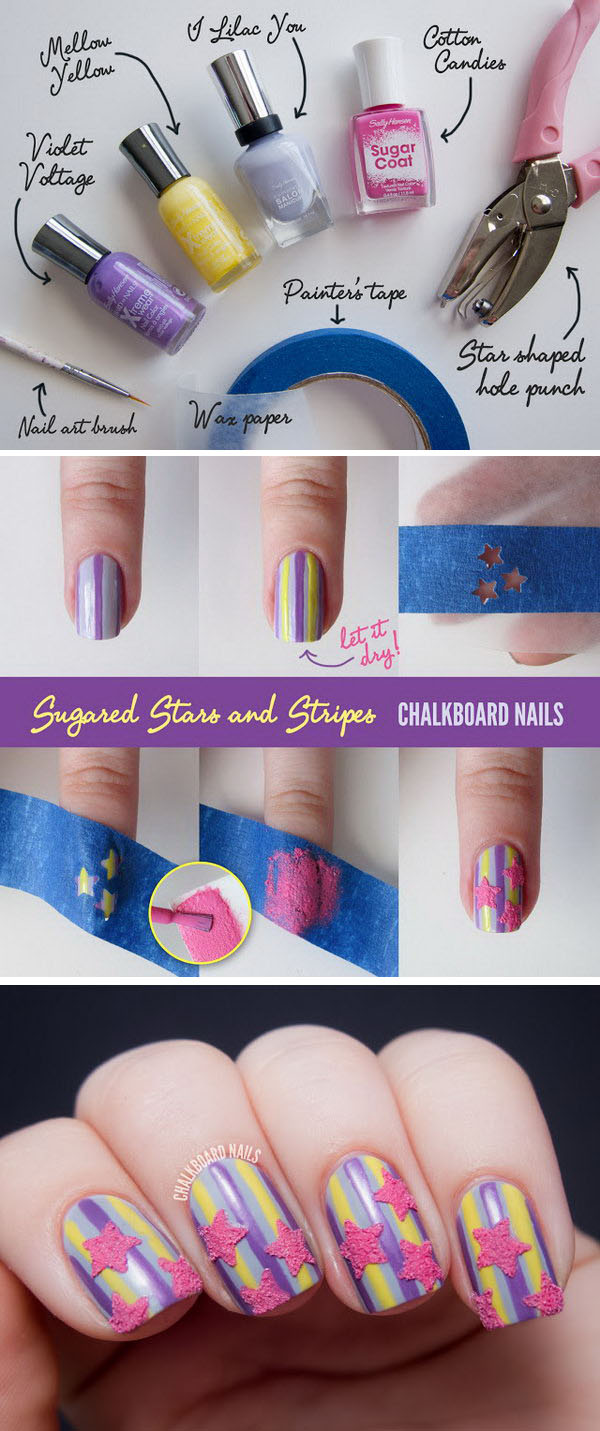
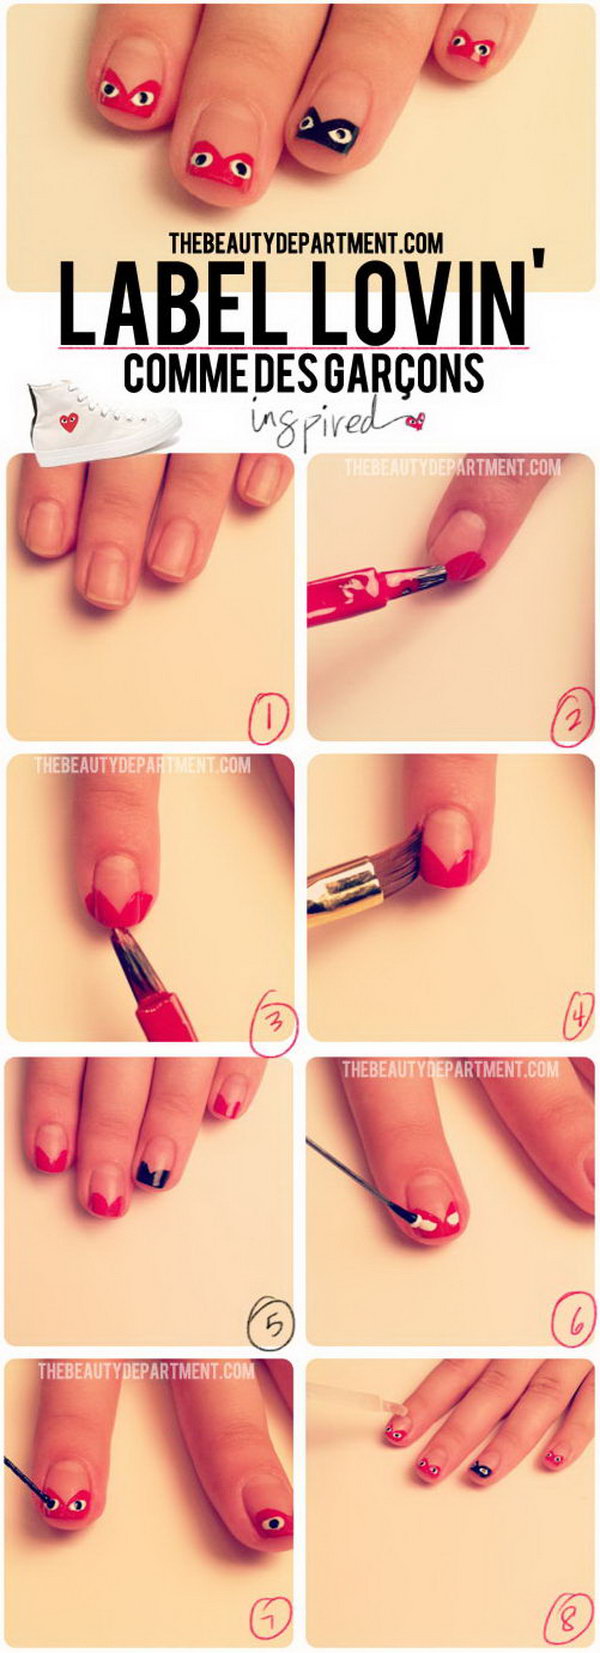
20+ Easy and Fun Step by Step Nail Art Tutorials - Noted List

Easy Cherry Blossom Nail Art: Step by Step Tutorial - Deck ...

Polished Art: Zebra Print Tutorial

Galaxy Nails Tutorial Pictures, Photos, and Images for ...

Hawaiian Flower Nail Art Tutorial
Cool And Easy Step By Step Nail Art Designs - Hative
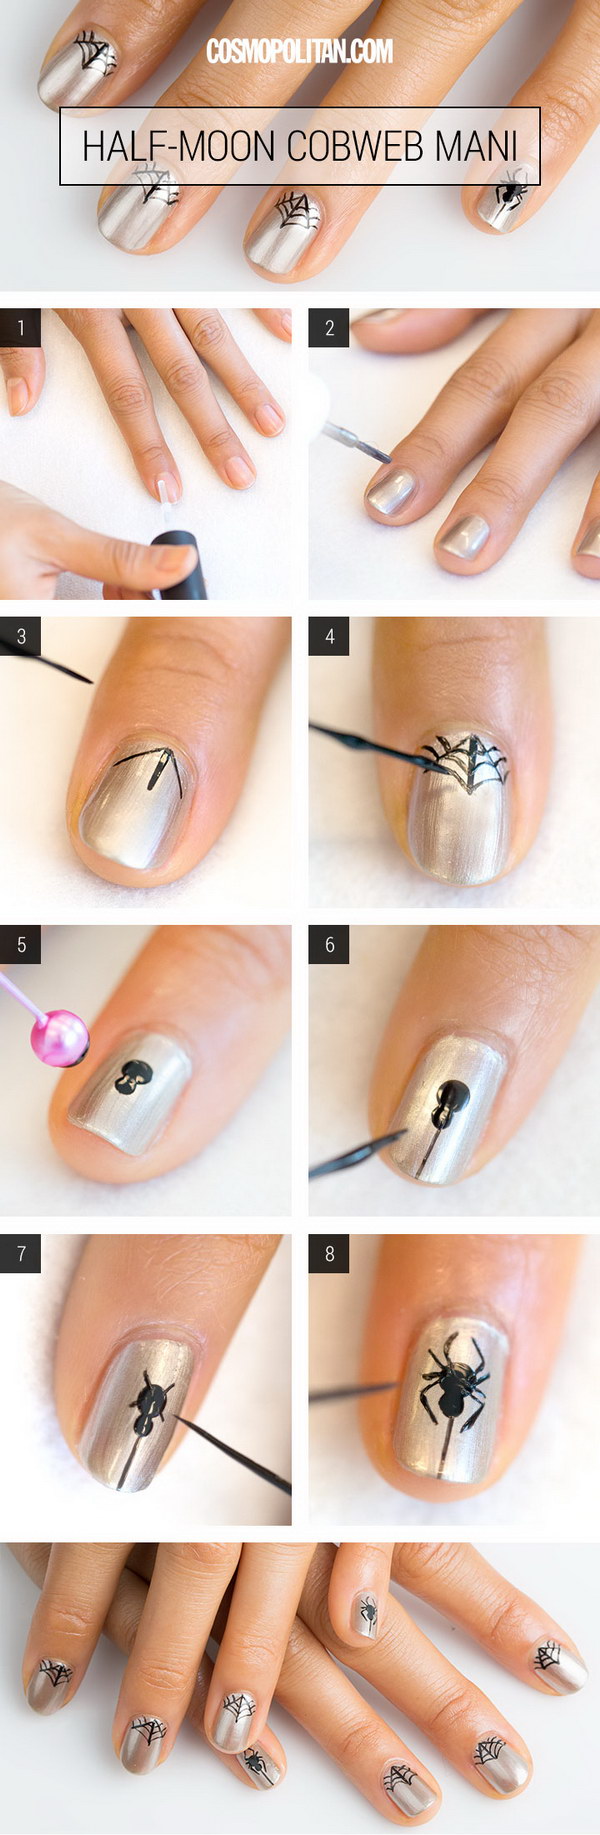
20 Step-by-Step Halloween Nail Art Design Tutorials 2017
Create a base by applying two coats of the white nail polish. Instructions on how to use an electric nail file accurately and safely The first step to using an electric file is to use a cone or barrel bit and clean out underneath your fingernails. DIY Nail Art Tutorials: Rhinestones Art Designs Step By Step with Pictures Let's learn to do so with a simple and easy pick of the day, style's step by step tutorial.

Post a Comment for "Step By Step Nail Art Instructions With Pictures"